The Provident Homemaker
  • Recipes and Info
    • Making Bread
  • My Blog
  • Favorite Resources
  • Documents and Files
  • 52 Weeks of Building Storage

Save the Squash!

9/20/2021

0 Comments

 
On the Studio5 morning show on September 7, I taught a short segment on things to do with your summer squash, including a better way to freeze it.  Here's a link to the Studio 5 video and the recipe that was shared-- 

Glazed Lemon Poppyseed Surprise Muffins
Makes 12-15

Muffins:
1 pound yellow summer squash (to make 2 cups puree)
Zest of one lemon*
¾ c. sugar
1 egg
¼ c. vegetable oil or melted butter
1 tsp. vanilla extract
1 tsp. almond extract
2 c. flour
½ tsp. salt
1 Tbsp. baking powder
1 Tbsp. poppy seeds

Glaze:
Juice of 1 lemon
Sugar

Preheat the oven to 375°. Lightly coat the inside of 12-15 muffin cups with cooking spray. Wash and trim the summer squash; cut into 1” chunks. Place in blender or food processor along with lemon zest, sugar, egg, oil or butter, and extracts. Puree until smooth. In a medium-sized bowl, combine flour, salt, baking powder, and poppy seeds. Stir until seeds are evenly distributed. Pour lemon-squash mixture over top; stir until just combined and there are no flour pockets left. Divide between muffin cups, and bake for about 20 minutes, until lightly browned and top springs back when lightly pressed.

While muffins are baking, make the glaze: measure your lemon juice, put it in a microwave-safe cup, mug, or small bowl, and add double that amount of sugar. For instance, if you have 3 Tbsp. juice, add 6 Tbsp. sugar. Stir. Heat in the microwave until it just comes to a boil, and stir again. Set aside to cool until the muffins are done.

When the muffins are baked and still hot, pour or brush the lemon glaze over top. Use it all up!

*If you don’t have a fresh lemon, instead of the fresh zest, use any of these instead: ½ tsp. lemon extract, 2 tsp. dried zest, or 12 drops food-grade lemon essential oil.
0 Comments

Refreshing Watermelon Salad

6/21/2014

0 Comments

 
Picture
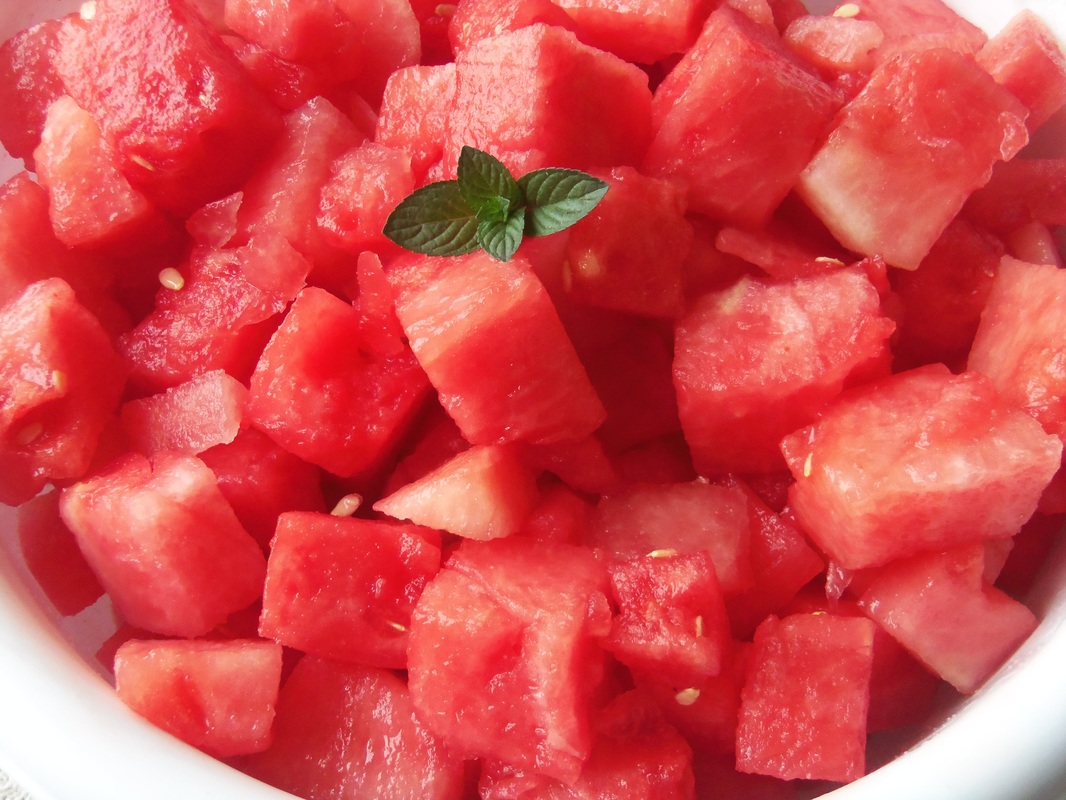
Sometimes you pick a perfect watermelon:  firm, juicy, sweetness dripping from every piece.  Sometimes the melon could use a little bit of help.  Or sometimes you just want a little variety in the flavor department.

Several years ago I found a recipe for a lemon-and-mint-infused syrup to pour over watermelon, or over a mixture of watermelon, cantaloupe, and honeydew.  It took a few hours to make the syrup, though.  Now that I have essential oils on hand, the flavor base takes almost no time at all!

Citrus-Mint Watermelon Salad
(enough syrup for 4-8 lbs melon while weighed with the rinds still on)

1/4 c. sugar (OR 3 Tbsp. honey)
2 Tbsp. lemon juice
1-3 drops mint essential oil (1 for subtle flavor, 3 for very noticeable)
6 drops any combination of citrus oils (lime, orange, lemon, grapefruit... I used 3 drops lime oil, 3 drops grapefruit oil)

Stir together the sugar and lemon juice; bring to a boil, stirring just until sugar is dissolved.  If using honey, there is no need to heat it; just stir the honey and lemon together.
Let the syrup cool slightly (if the sugar version), then add mint and citrus oils.

Pour over cut-up melon- plain watermelon or a combination of melons- and stir well to coat.

This would make a fun Fourth of July salad if you added some fresh blueberries to the watermelon.  

BONUS:  the juice left in the bottom is delicious plain (you might prefer it diluted with some water) or added to smoothies.

0 Comments

Coconut Cake- using coconut flour and agave

4/1/2014

0 Comments

 
Picture
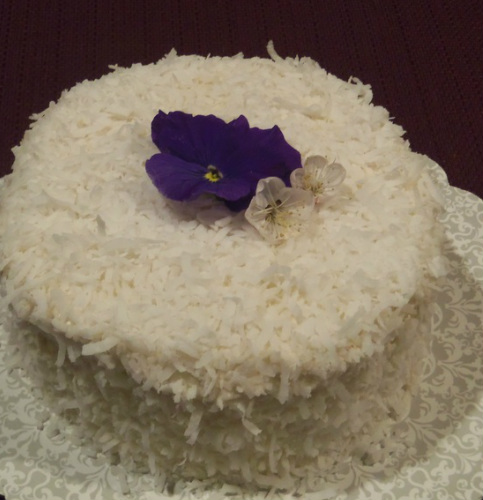
This gluten-free cake is high in fiber, but you'd never know it when eating it.  It just tastes like a moist coconut cake.  It also has a delicious cream cheese frosting that you can sweeten using agave or honey, and a lemon-cream cheese filling between the layers.  This makes a small cake, 6" round if two layers, or a single 8" layer:  a much better size for most people!

Coconut Cake:

4 large eggs
1/2 c. melted coconut oil
1/2 c. agave nectar
1 Tbsp. vanilla
1 tsp. coconut extract
1/2 c. coconut flour
1 tsp. baking soda (this is too much, I can taste it and the cake overbrowned)
1/4 tsp. salt
1/8 tsp. xanthan gum
1/2 c. shredded coconut, either sweetened or unsweetened
Cream Cheese Agave Frosting (recipe below)
1 1/2 Tbsp. orange or lemon marmalade
1 cup sweetened shredded coconut 

Preheat oven to 350 degrees.  Grease sides and line bottom of a 6" round pan* with a circle of parchment paper.  Set aside.

Whisk eggs until light in color and a little foamy, about 2 minutes.  Add the coconut oil, agave, vanilla, and coconut extract; mix well.  Add coconut flour, then put the baking soda, salt, and xanthan gum on top of the coconut flour, and mix all together.  The batter will be very thin at first, but will thicken within minutes as the coconut flour begins absorbing liquid.  Stir in the 1/2 c. shredded coconut.

Pour into the prepared pan.  Bake until center no longer jiggles and toothpick inserted in center comes out clean, about 45 minutes.  Run a knife around the outside edge of the cake to loosen it.  Cool cake, in the pan, on a cooling rack for 10 minutes.  Remove from pan/s and cool completely.

When cool, split the 6" cake into two layers.  Frost the first half with lemon-cream cheese filling.  Place the other layer on top of the filling, then frost the entire cake.   Pat coconut onto the sides of the cake, then sprinkle it all over the top.
  
*If you don't have a 6" round, you may use either one 8" round (reduce baking time to about  30- 35 minutes), a 9x5 loaf pan (about the same baking time), 12-15 cupcakes (about 30-35 min. of baking), or four 4" round pans (reduce baking time to  18-20 minutes each).

Cream Cheese Agave Frosting:  use the recipe for Fluffy Honey-Cheesecake Frosting, except substitute agave for the honey.

To make the lemon-cream cheese filling (or orange-cream cheese filling), take  3/4 cup of the Cream Cheese Agave Frosting and put it in a small bowl.  Add 1 1/2 Tbsp. marmalade and stir.  
0 Comments

Moist, refined sugar free, grain-and-gluten-free Chocolate Quinoa Cupcakes

3/14/2014

0 Comments

 
Picture
A friend recently shared this delicious recipe with me.  Since I wanted to make cupcakes for a friend who can only handle sweeteners like honey and agave, it was time to tweak the recipe.  You can find the original, sugar-sweetened, recipe here, if you want to compare it to my version. As cupcakes, they needed more moisture than the original, plus a couple things needed adjusted to allow for honey.  And I discovered that the amount of water your quinoa was cooked in makes a huge difference in whether they're dry, moist, or collapse when baking.   (Not to worry, the problem should be solved now!)   Quinoa is technically a seed and not a grain.

I tried really hard to find a way to use just the blender to make the batter, and not need both it and a bowl, but the batter puffs up so much once the leavening is added, that it just didn't work out that way .  Oh well.

Everyone who has tried these loves them.

Moist Chocolate Quinoa Cupcakes

1/2 c. uncooked quinoa*
1 1/4 c. water 
1/3 c. any kind of milk (dairy, almond or coconut are fine)
4 large eggs
1 tsp. vanilla
3/4 c. melted coconut oil or other liquid vegetable oil
2/3 c. honey
a few drops of orange essential oil, or the washed peel of one clementine, optional
1 c. unsweetened cocoa powder
1 1/2  tsp. baking powder
1/2 tsp. salt

Cook the quinoa, covered, in the 1 1/4 cups water:  either combine in the microwave or stovetop.  To microwave,  put them in a microwave-safe bowl, cover, then cook for 5 minutes at full power, then 5 minutes at 50% power.  For stovetop:  combine in a pan that has a tight-fitting lid.  (If the lid isn't, use 1 1/2 cups water to compensate for what will evaporate.)  Bring to a boil, reduce to a simmer, and let simmer for 20 minutes, until water is all absorbed.
*or use 2 cups cooked quinoa and omit the water.

Preheat oven to 375 degrees.  Put liners in 18-24 cupcake tins, depending on how high you want the cupcakes.

Combine in a blender the cooked quinoa, milk, eggs, vanilla, oil, honey, and orange oil/peel if using it.  Blend until smooth.   Mix the cocoa powder, baking powder, and salt in a medium bowl.   Pour the quinoa mixture over the top, and stir until well-combined.  Spoon into cupcake liners, or use a spring-loaded ice cream scoop instead to portion out the batter.

For an easy, sweet topping, sprinkle each cupcake before baking with a few semisweet chocolate chips and chopped pecans or other nut.

Bake for about 20 minutes, until the top of a cupcake springs back when lightly pressed with a finger.

Frost with your favorite frosting if you like, or  try any of these.   The cupcakes above are frosted with whipped coconut cream with melted chocolate beaten in:  use 1 cup of chilled coconut cream and 1 cup melted semisweet chocolate.  Whip the cream until it starts to hold soft peaks, then add in the chocolate plus a teaspoon of vanilla and a pinch of salt.  Beat until fluffy and smooth.


0 Comments

'Clean Eating' Paleo Fudge

12/10/2013

1 Comment

 
Picture
Are you trying to eat healthier but really, really crave fudge?  This one uses healthy fats and honey.   It's also dairy-free and gluten-free for those who need to avoid those.  

Avocados are high in three amazing fats: both phytosterols and PFAs (polyhydroxylated fatty alcohols) are documented to be anti-inflammatory, and oleic acid, which helps our digestive tract absorb fat-soluble nutrients.  Coconut oil is healthy for many reasons, including being anti-inflammatory and having a high lauric acid  and medium-chain fatty acids content.  
But enough about that.

The big question is, doesn't avocado totally mess up the flavor here?

No.  I have a pretty discriminating set of tastebuds, and the only way I can detect the avocado is by a faint fruity flavor.  Because of that, some of my favorite variations of this fudge include fruit:  orange zest or oil, chopped dried cherries (and toasted almonds!), and the like.  This fudge is really only a slightly thicker version of my ChocolateTruffle Pie.

The recipe below includes both orange and pecans; if you don't want them, just omit the pecans and orange zest or orange oil.

You can also use this recipe to make truffles; cut into squares, then quickly roll each square into a ball; roll in cocoa powder or chopped nuts to coat.

Orange-Pecan Fudge            makes about 3/4 of a pound 

1 ripe avocado, peel and pit removed
1/4 c. coconut oil
1/4 c. honey
1/4 c. unsweetened cocoa powder
2 Tbsp. water
zest from half of an orange (about 1/2 Tbsp.), or 2 drops orange essential oil
3/4 tsp. vanilla
pinch of salt (1/16 tsp.)
1/4 c. toasted chopped pecans

Line a 5 1/2 x 3 loaf pan (or 2-cup rectangular or square container) with foil; spray with nonstick cooking spray.   Set aside.
Put the water, zest (should be about 1 Tbsp), honey, coconut oil, cocoa, avocado, vanilla, and salt in a blender or food processor.  Run on high for 1-2 minutes, until smooth.  Pour into prepared pan.  Cover and refrigerate 2-3 hours until set.   

Store in the refrigerator or freezer.  If freezing this, let pieces thaw about 10 minutes before serving.  I don't know how long it will keep in the fridge because it gets eaten so quickly.   But the one piece that survived us for a week and a half was still good.  Any longer than a week, though, it'd be better preserved in the freezer.  Wrap tightly.

1 Comment

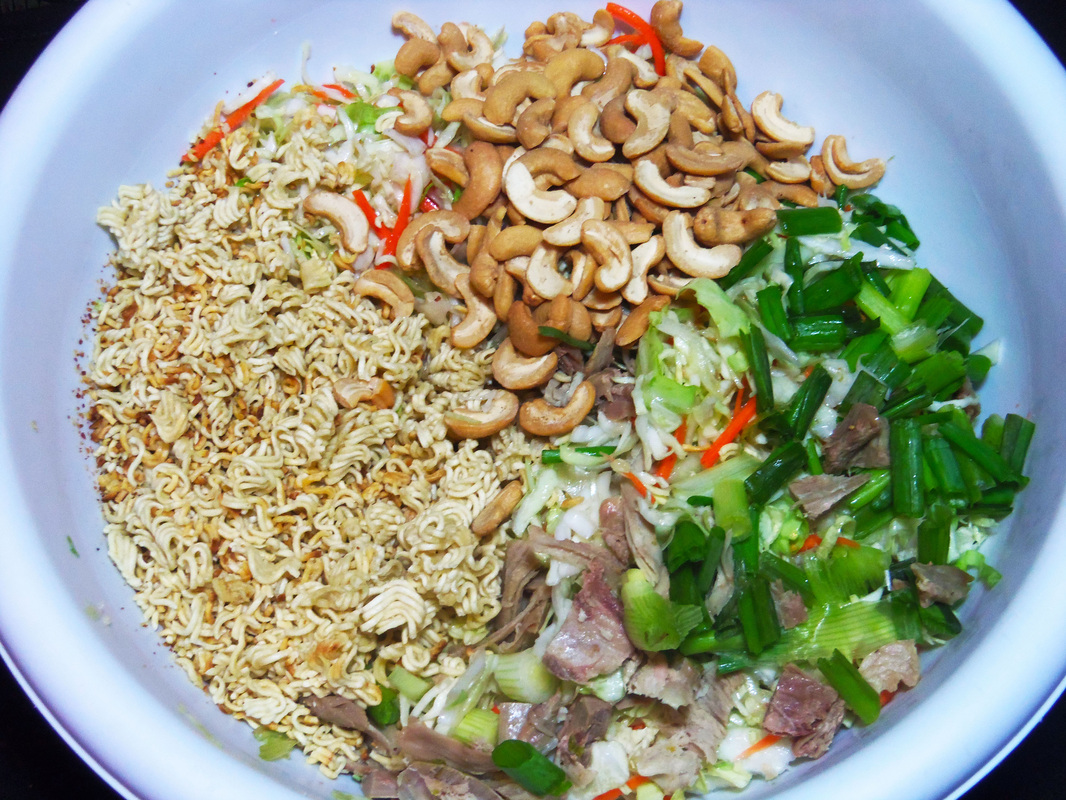
Turkey Ramen Cabbage Salad

11/30/2013

0 Comments

 
Picture
Most salads like this use so much dressing that there's a pool of it at the bottom of the bowl.  And the dressing is about all you taste.  
Not this one.  There's enough oil in the salad to help you unlock those fat-soluble vitamins; both cabbage and cashews are very high in Vitamin K.  And you can actually taste the cabbage, in a way that accents only its best features.  

If you have any left over, even though the noodles will not stay crunchy by the next day, the cabbage does.

Cabbage Ramen Salad        Serves 4-6.  Or two who really, really like it.

1 tsp. olive oil
1 package Ramen noodles
2 Tbsp. olive oil
1 Tbsp. rice wine vinegar or apple cider vinegar
1 Tbsp. honey or sugar
1/2 tsp. salt
1/4 - 1/2 tsp. black pepper
1/2 tsp. ginger OR 1 1/2 tsp. chopped crystallized ginger OR 1 drop ginger essential oil
1 small cabbage, shredded, OR a 14-16 oz package coleslaw mix (cabbage and carrots)
2 green onions, chopped
1 c. cooked turkey or chicken, diced
1/2 c. cashews, optional

Heat 1 tsp. olive oil in a large skillet on high heat.  Break the Ramen noodles into small pieces and add to the hot oil.  (You won't need the flavor packet for this recipe.)  Stir dry noodles constantly for about 2 minutes, until some of the noodles start turning a toasty brown.  Remove from heat and set aside. 

In a medium bowl, combine remaining 2 tbsp. olive oil, vinegar, honey/sugar, salt, pepper, and ginger. Stir well to combine.  Add the cabbage or coleslaw mix, green onions, turkey/chicken, and cashews.  Stir thoroughly, until no puddle of dressing remains on the bowl's bottom.  Serve right away for the crunchiest noodles.  

0 Comments

Caramelized Butternut Squash with Rosemary

11/23/2013

0 Comments

 
Picture
How about this for a new side dish?  I love rosemary and olive oil. Or butter.  Or both.  :)

This recipe showed up at my house this week in a save-the-farmlands newsletter, of all things.  (I'm all for saving farmlands, but how about nixing the property tax instead of government paying them subsidies?!)  And since my live rosemary died over last winter and there's a bottle of rosemary essential oil in my cupboard, I adapted it to use that.

You can substitute about any squash you have on hand that is a similar size.  Or use something large, like half a banana squash or pumpkin, or kabocha squash, etc, but if you do, then double the amount of other ingredients except rosemary oil.

Caramelized Butternut Squash with Rosemary 

1 butternut squash
1 tablespoon olive oil
1/4 teaspoon salt
3 tablespoons unsalted butter
2 sprigs rosemary or one drop of rosemary essential oil (better if you have a 1 ml bottle, then use  two of those tiny drops) on top of the butter

Preheat oven to 375 degrees F.
Cut the squash in half lengthwise; scoop out seeds.   (You can wash, roast, and salt these, just like pumpkin seeds.)  Put the squash cut-side up on a baking tray.
Drizzle with olive oil, sprinkle with salt.  In each natural 'bowl' where the seeds used to be, add 1 Tbsp. butter and a rosemary sprig.  EXCEPT:  if using rosemary oil, melt 2 Tbsp. butter and add the drop to it.  Pour half into the cavity of each squash half.  Cover tightly with foil and bake for 45 minutes, or until tender when poked with a fork.

Remove from oven and pull off the foil; let cool until you can handle it.  Scoop out the flesh.  

Heat the last 1 Tbsp. butter in a large skillet over med-hi heat.  Once melted and hot, add the cooked squash.  Gently toss until some parts become caramel-y brown.  Serve hot.

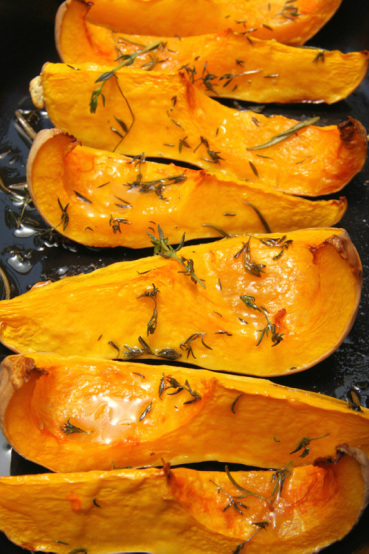
NOTE:  the photo shows the squash as it comes out of the oven, not after being scooped out and browned.  If you want it browned from the oven, do this instead:
When tender, pull off foil and brush the last tablespoon of butter over the cut edges.  Return to the oven and turn on the broiling element.   Broil, checking every minute.  (I am not kidding.  Seriously check every minute!)  If your baking tray is on the middle rack in the oven, this will probably take about 3-4 minutes.  If the tray is up high, close to the element, it might only take 1 minute, maybe 2.

0 Comments

Elderberry Syrup

11/15/2013

0 Comments

 
Picture
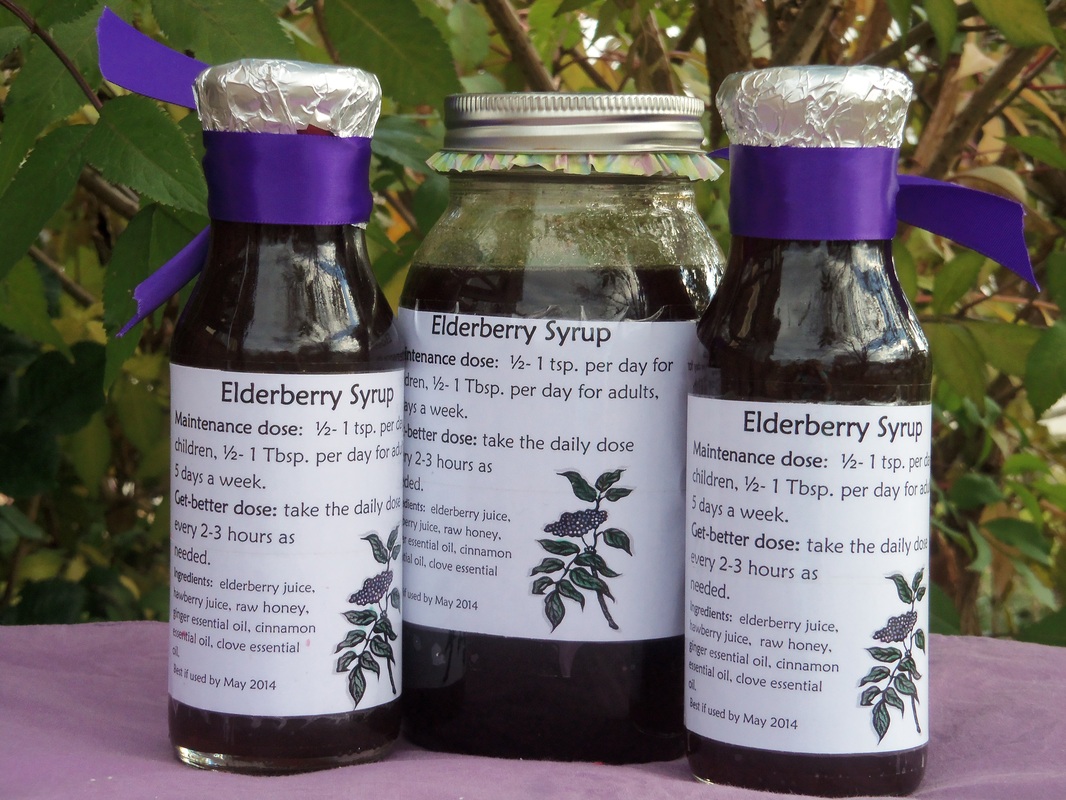
Elderberry syrup is known as a wonderful immunity booster and antiviral- which means it'll help knock down the flu or any other virus-caused illness.  It's also really, really delicious on pancakes.  Or a splash added to desserts or fruit salads.  Or brushed on a spice cake.  Or mixed with chilled sparkling water.  Or... you get the idea.
 Now that there's a jar in my fridge, I may have to watch to be sure my children don't sneak in and use up all my 'medicine'.   Just for that reason, I wax-sealed the lids on the jars I plan to share with others.  

I've already used it.  My family has had a nasty cold or flu this week; we've had missed school days and work days from it.  Yesterday it hit me hard, and felt like it was on the verge of turning into bronchitis or pneumonia.  I've been taking either elderberry infusion (tea) or the syrup at least three times a day since feeling it come on a couple days ago, and today I feel much better.  I suppose that may or may not have anything to do with the elderberries... but I'm keeping the routine up until I'm better!  Yum.

I started with 2 pounds of berries, used a steam juicer, and the first 2-3 cups of juice were nice and dark; strong enough to use without boiling to condense it.  The longer the berries steamed, though, the lighter the juice got, so I boiled down the last three cups to yield about 1 1/2 cups.

You'll notice in the photos below that some of those berries don't look exactly the same as the others... I have a young hawthorn tree.  It produces berries, but not yet enough to make a batch of anything yet.  The haw berries are said to be good for reducing inflammation (as well as normalizing blood pressure and helping strengthen and regulate the heart)- so I threw them in with my elderberries.  Honey is used in this instead of sugar because of its soothing, anti-inflammatory, and healing properties.

If you want to make a wax seal, paraffin works great.  I had a small ball of red cheese wax I'd saved, and used that.

Elderberry Syrup
Start with 2-3 cups elderberry juice (depending on strength)- if not strong, boil to reduce to 2 cups.  To the warm, NOT hot juice (if you want to preserve the enzymes if using raw honey), stir in these ingredients:
2 cups honey
5 drops ginger essential oil
3 drops cinnamon essential oil
2 drops clove essential oil


Store in the refrigerator.  Probably best used within a couple months- though I've had syrups stay nice for a year, refrigerated.  You could store them longer if you seal them in sterilized jars. 

To use medicinally, take a tablespoon straight or mixed in 6-8 oz warm water, every 3 hours if you're sick and an adult, or take once a day as a general immunity booster.  See the label below for more details.  

If you want to start with berries but don't have a steam juicer, and want to use the spices themselves instead of essential oils, combine 4 oz (2/3 c.) berries in 3 ½ c. water, a thumb-sized piece of fresh ginger, 1 tsp. cinnamon, and ½ tsp. cloves; Simmer until water is reduced by almost half; strain, pressing on the berries.  Cool until just warm, stir in honey.

On a related note, you can use jelly to make gourmet pancake syrup:  see here.
0 Comments

Summery Fish and Vegetable Bake

9/2/2013

0 Comments

 
Picture
Can you tell it's zucchini and tomato season?  I've wondered before why so many recipes combine those two vegetables.  I now suspect that it's partly because the plain zucchini excels at tasting like whatever you cook it with, and very few things can top a fresh garden tomato in the flavor department.  This recipe also uses any mellow white fish, probably for the same reason.  The other ingredients both perk up and round out the flavor.  This one's a keeper.

Baked Fish and Vegetables

4 Tbsp. butter, softened
3 garlic cloves, minced
1 Tbsp. lemon juice
1 tsp. grated lemon zest or 2-3 drops lemon essential oil
1 lb. zucchini or summer squash,sliced 1/4" thick
1 lb. tomatoes (3 medium), sliced thin, OR cherry tomatoes, halved
1/2 c. minced fresh basil or 1 drop basil oil
salt and pepper
1 1/2 lbs. mild white fish 
2 Tbsp. white balsamic vinegar*

Preheat oven to 450 F and move an oven rack to the lowest position.  Mix together the butter, minced garlic, lemon juice, and zest.  If using basil oil, add it to this mixture.  Rub a little of the butter mixture on the bottom of a 9x13 pan.

Put the zucchini slices in the bottom of the 9x13 pan; add the tomatoes in a second layer.  Sprinkle with salt and pepper and with half of the basil (unless you used basil oil).  Pat the fish dry with paper towels, then place the fish on top of the tomatoes.  Dot the butter over the top, add the rest of the basil, and drizzle with the vinegar*.  Cover tightly with foil; bake about 20 minutes, or until the fish flakes when you twist a fork in it.  Serve immediately.

Serve over rice to pasta to soak up the delicious sauce!

*The original recipe, from America's Test Kitchen, calls for 1/4 cup dry white wine.  I don't cook with wine, so the white balsamic is what I found in my pantry to add the savory flavor.  Since it's strong, I used only half as much (2 Tbsp. instead of 1/4 c.).  If you have neither, chicken broth and a splash of soy sauce would give a similar depth.
0 Comments

Relieve Swelling with Turmeric

8/14/2013

12 Comments

 
Picture
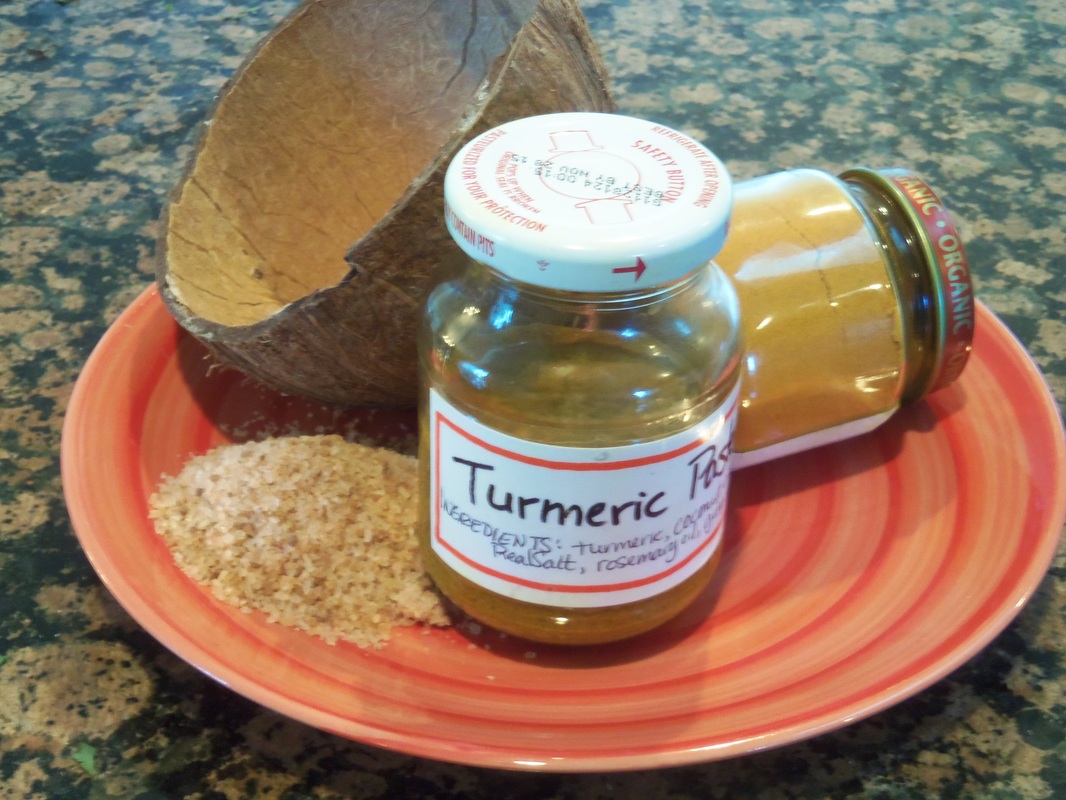
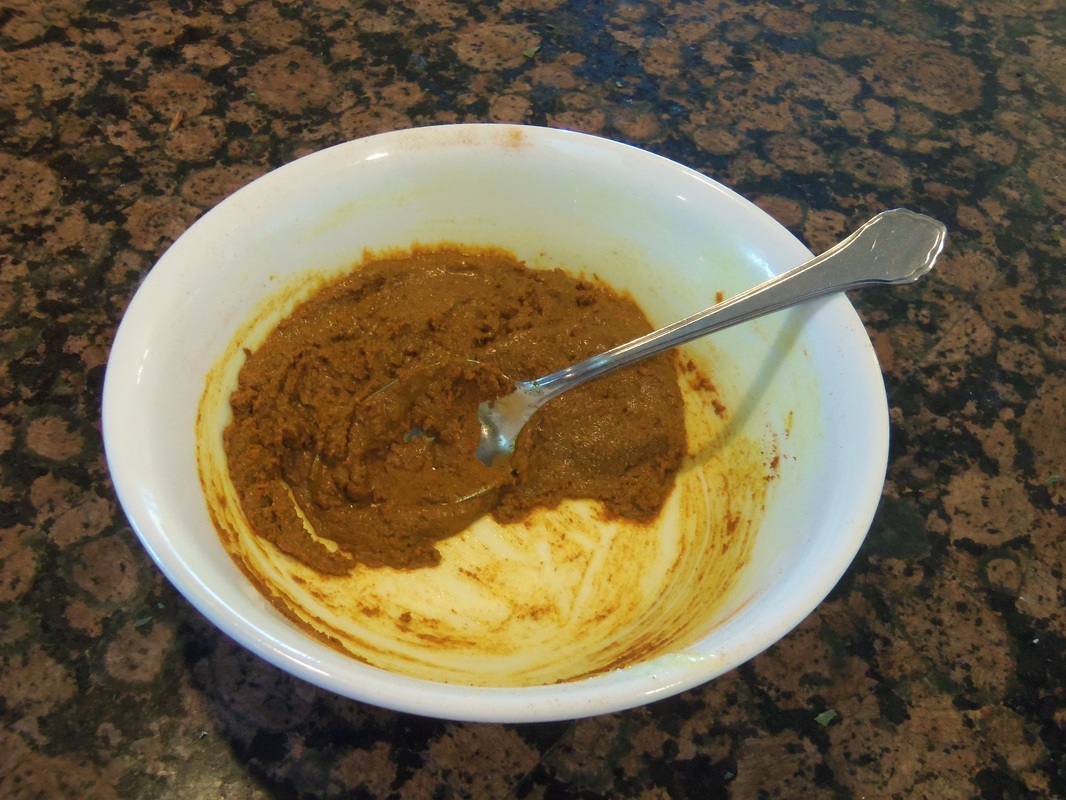
Homemade Turmeric ointment!

About a year ago my right ankle swelled up and became tender to the touch.  There was no recent injury that I knew of.  After a few days, I wrapped it with an Ace bandage.  The swelling went down under the bandage, only to pop up on the top of my foot.  After wrapping the top of my foot, the swelling moved to the other side of my ankle.  Weird.  At that point, I got online to look for how to pull down swelling.  What I found was an ancient Ayurvedic medicine: turmeric and salt.  Well, those were two ingredients I had on hand, and easy to mix.  
I tried it: applied it to a folded damp paper towel, slapped it on the ankle, and wrapped it to make it stay in place.

Lo and behold-- after a day, the ankle was less painful.  After two days, the swelling was gone.  GONE!  And it didn’t come back. My ankle was stained bright yellow for a week, but, hey, it felt great.

Turns out that turmeric contains curcumin, a powerful anti-inflammatory.  There is lots of evidence that this kitchen spice is also effective against cancer, arthritis, preventing and reversing Alzheimer's, and more.

What about the salt?  You know how it kills snails: it pulls water through cell walls, essentially dehydrating them.  This is an example of osmosis.  It works on the same principle to pull extra water out of your skin or underlying tissues.  I used RealSalt because it includes trace minerals.  The salt and turmeric reinforce aspects of each other.

The basic mixture is 2 parts turmeric to one part salt, then mix with just enough water or oil to make a paste.  If you use water, it's considered an actual paste; if you use oil, it's technically an ointment.  Water might help it penetrate your skin better, but curcumin is fat-soluble, so it might be more potent as an ointment.  I don't know for sure; it just seemed logical to use the oil, which has healing properties itself if you use either coconut oil or olive oil.  Curcumin's bioavailability is said to increase if you add something with quercetin.  Dock (sorrel) has large amounts; so does apple, broccoli, cranberries, and more.  Since I didn’t find anything in my house and yard while I was mixing that was easy to use that wouldn’t spoil in it, I skipped that part.  Maybe next time I’ll dry some dock and heat it for a couple hours with the coconut oil base.  Or add a little green drink powder.  It still works fine without it; there was no quercetin in what I used on my ankle.  

This new batch also contains a couple essential oils this time around (didn't with my ankle), to hopefully enhance the healing properties; this will go on a leg injured by falling down the stairs, made worse by a lack of circulation and movement, now suffering- months later- with fluid in the joints and pain. Rosemary is relaxing, a good tonic for nervous and circulatory systems, and helps increase vigor and energy.  Ginger relaxes blood vessels is a strong circulatory stimulant, and is often used in massage oils and to relieve aches and pains.   A standard amount of essential oils for topical use is 1 drop essential oil per 25 mL of carrier oil, or about 5 drops per ¼ cup oil.

Please remember that anyone can be allergic to foods; don't use ingredients you've had reactions to, and watch for new reactions.  When you apply this to your skin, wrap it with something that doesn't matter if it gets stained- because it will!  (Turmeric is also a great fabric dye.)

Here are the quantities I used for this batch:

4 Tbsp. turmeric (1/4 c.)
2 Tbsp. RealSalt
2 Tbsp. coconut oil or olive oil (I used coconut oil)
2 drops rosemary oil, optional
2 drops ginger oil, optional

Best stored in a small glass jar. Babyfood jars are great.
Picture
12 Comments

Lemon-Summer-Squash Bread

8/1/2013

0 Comments

 
Picture
Everyone knows you can make bread with zucchini- but what if you have a giant yellow summer squash hiding in the garden?

Both zucchini and yellow squash-- either straightneck or crookneck-- are summer squash, with a similar flavor and texture, and CAN be interchanged in recipes.

My family's favorite quickbread is Lemon Zucchini Bread- so today we got Lemon-SummerSquash Bread.  I no longer shred zucchini -or this squash- for recipes, but puree it instead.  No more strings.  As a bonus, if I'm freezing some for later use, the texture does not change when thawed, unlike shredded squash.  

AND, if you're pureeing it, you can have the blender (or food processor) mix all the wet ingredients for you.

This bread is great for breakfast.

The recipe is found over here, though the blender method is below. 
0 Comments

Giving Molluscum the Boot

7/18/2013

1 Comment

 
Picture
Have you seen this before?  It's an example of molluscum contagiosum, and just like its name sounds, it is contagious.  

And yes, we got it.  Lame.

It's caused by a poxvirus and can stick around for quite a while.  Each bump lasts from about 6-12 weeks, but more pop up, so an infection tends to last from 8 months to two years. It can be much longer, especially in those with suppressed immune systems. 

The first time I noticed anything was when a pimple-like thing on my son's arm didn't clear up within the expected few days.  It didn't look quite right.  It reminded me a little of a chicken pox blister, but the symptoms weren't right for that either; there was no fever or anything.  Just about the time the blister finally disappeared, his younger sister had some unusual-looking bumps pop up under her arm.  Then they grew a little and spread to her torso, back, and under the other arm.  About that time I spent some time online trying to discover what this was and how to get rid of it.  If you want to get our solution without reading a bunch more, skip down to the bottom of this.  :)  

Each bump or blister is roughly shaped like a pearl, from 1/8" wide up to the size of a marble, and typically has a dimpled center.  If you pinch it off, a white waxy core often comes out with it, and the exposed spot will bleed more than you expect from such a tiny hole.  The core has the virus, which is just in the skin, so it can't stay dormant somewhere in your system. When it's gone, it's gone unless you pick up an infection somewhere else. It's most common in children under 10, but anyone can get it, and there's no permanent immunity.

It spreads through skin-to-skin contact, even things like shared clothing or towels, which is probably why three of my children got it. Things that make it worse include scratching, moisture (warm places on the body or long soaks in the tub),  a ruptured lesion touching another area, or not washing hands after touching or scratching these.

  I thought maybe they'd clear up on their own, but after 5 weeks had had enough of that, as they continued to spread.  I found all kinds of ideas online to get rid of them:
twice-daily applications of tea  tree oil or apple cider vinegar (both burn a little if undiluted),  salicylic acid, prescription-only chemicals that destroy the top layers of the bumps, liquid nitrogen followed with scraping.  Maybe different things work for different people.  
It turned out that at least 5 families in my neighborhood had children with molluscum, so us moms put our heads together to talk about what we'd each tried.  

One mom had the answer, and it wasn't any of the above.  She'd gone to the doctor (all the moms who did thought the cure was worse than the disease- if the cure even worked.  Which it didn't for most of them.)- paid $80 for a prescription cream, and the cream didn't clear it up, even after weeks.  She finally got on her knees and essentially said, "Lord, I know YOU know how to solve this; please let me know how to help my children."

The idea came to her to put olive oil on them.  So she pinched off all the blisters, being sure to remove the center with the virus.  Then she rubbed olive oil on all the spots at least twice a day, 3 or 4 times a day when she remembered.  They all cleared up.

I  tried it, keeping up the oil-rubbing regimen for about two weeks, getting rid of any new blisters that appeared. 

It worked for us!!!    Hopefully it'll work for you, too.

Picture
The pox up close and magnified. Image: Wikipedia Commons
1 Comment

Swiss Steak (er, Burger)

2/22/2013

0 Comments

 
Picture
Swiss Steak was made, in the beginning, to be a budget-friendly main course.  You take a cheap steak, pound flour and seasonings into it, and braise with tomatoes and onions until the tougher cut becomes tender.


Cheap steak is still pretty expensive in my book.

Hamburger is cheaper, and results in something that tastes just as delicious, even if the texture is different than having a solid piece of meat.  That's OK with me.  I was a little doubtful about the 'tomato gravy' when I first saw the recipe, but it is superb!  
The original recipe came from America's Test Kitchen, but I've modified it a few ways...


Swiss Steak with Tomato Gravy
Serves 8

2 lbs. ground beef or 8 (4 oz) patties
salt and pepper
1 onion, sliced thin
1 Tbsp. cornstarch or flour
2 (14.5 oz) cans diced tomatoes OR one quart home-canned tomatoes (OR one can diced tomatoes and one can of chicken broth)
3 garlic cloves, minced
1/2 tsp. dried thyme OR 1 1/2 tsp. fresh OR 1 tiny drop thyme essential oil
1 Tbsp. chopped fresh or dried parsley
Cooked rice or noodles

Set an oven rack to the highest position and turn on the broiler.  Shape burger into 8 patties (if they're not shaped already); set them on a rimmed baking sheet or in a 9x13 pan.  Set onions on the baking sheet too.  Sprinkle meat with salt and pepper.  Broil patties and onions for 2-4 minutes or until they have a good browned crust at least around the edges.  Turn off broiler and heat oven to 350 degrees.

Meanwhile, put the cornstarch in a medium saucepan and stir in about 2 Tbsp of the juice from the canned tomatoes.  Stir until smooth, then gradually stir in the remaining tomatoes, plus broth if using it.  Add garlic and thyme.  Stir over high heat until it comes to a boil.  

After the meat has come out of the oven, add the parsley and pour the tomato gravy over top.  Return it all to the oven and bake 20 minutes or until done and tender. 
Serve over rice or noodles, spooning sauce over.
0 Comments

Cupcakes for Two

2/13/2013

0 Comments

 
Picture
Picture
Are you craving a moist, flavorful cupcake?  Maybe you'd like gourmet cupcakes to serve your sweetie on Valentine's Day?
The 'extras' added here- coconut extract, shredded coconut, lime juice and zest- make these cupcakes Coconut-Lime.  Feel free to substitute whatever other flavors you like.  Any flavor cake mix will work.  You could make a pretty pink-speckled frosting for Valentine's Day by using one mashed strawberry in the frosting.  Since it's contributing liquid, omit the lime juice.


Cupcakes:
1/2 cup white cake mix
1/4 cup water
a little coconut extract (about 1/16th tsp)- or other flavor, optional

Put a paper cupcake liner in each of two custard cups or microwaveable mugs.  Beat the mix, water, and coconut extract together until smooth.  Divide between the two liners. Microwave each one for about 35-45 seconds or until there's just a small wet-looking spot in the center.  Let cool.

A very simple filling is a spoonful of vanilla Greek yogurt.  Poke a hole in the cupcake with a spoon, lift the torn part up, and drop about a tablespoon of  Greek yogurt.  Jam is a good filling, as is pie filling or frosting. Just use less of these because they're so sweet.

Frosting:
1 Tbsp. butter, softened
1 Tbsp. sour cream (or Greek yogurt, cream cheese, or butter, depending on the flavor you want)
dash of salt
a little vanilla (1/16th tsp)
about 2 tsp. lime juice (or lemon if that's all you have.  I used lemon juice and added a drop or two of lime essential oil.)
powdered sugar (about 1 cup)

Beat together the butter, sour cream, and salt.  Stir in the vanilla and lime juice.  Add 1/2 cup powdered sugar and stir until smooth.  If it's not thick enough yet, add more powdered sugar until it is.

Spread on the cooled cupcakes, then top with some toasted coconut and finely grated lime zest.

If you want chocolate frosting, simply add 2 Tbsp. cocoa powder to it.
0 Comments

Creamy Fruit Salad- CF

2/1/2013

0 Comments

 
Picture
One of my children is needing to avoid dairy for a while, but I found strawberries on sale and wanted a creamy salad using them.  Add some pudding?  Not an option.  Yogurt?  Nope. Whipped cream?   No, but... I had coconut cream.  The thick, creamy, good stuff you find at the top when you open a can of coconut milk.  So I used that.  It worked beautifully.  Everyone was happy.

It's super fast, too.  If you feel like making it fancier, you can whip chilled coconut cream (yes, it whips, just like dairy cream, but goes flat faster if it warms up).

Creamy (Dairy-free) Fruit Salad
1/2 pint fresh strawberries, hulled and sliced
2 bananas, peeled and sliced
1 apple, cored and chopped (I leave the peel on)
3 Tablespoons coconut cream
3 drops lime or orange essential oil, optional
2 Tablespoons shredded sweetened coconut

Combine fruit in a medium bowl.  In a small bowl, stir together the coconut cream and essential oil, until smooth.  Pour over fruit and stir gently to coat.  Sprinkle with coconut.
(If you like things sweet or if your strawberries are sour, add 1 Tbsp. honey to the coconut cream mixture
Serves 4-6


0 Comments

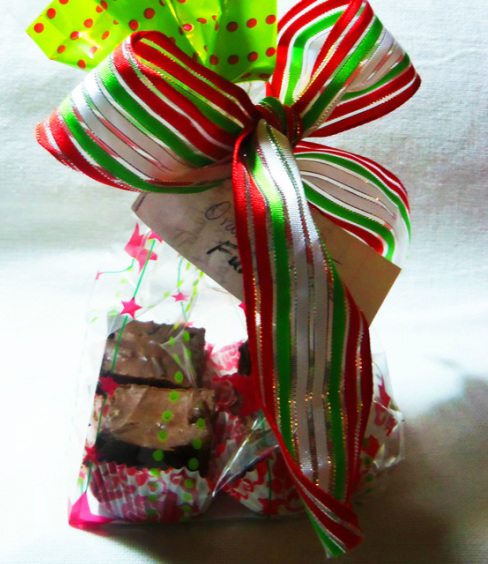
Neighbor Gifts, Gingerbread Syrup and Cherry-Almond Fudge

12/21/2012

0 Comments

 
Picture
Do you want something simple to give to friends and neighbors?  Here are some quickies; if you have more time you might like Candy Cane Bread, shaped and decorated like a candy cane.  
Recipes for the fudge and the gingerbread syrup are below.

For the jars to pour syrup in, I save jars through the year: spaghetti sauce jars, pickle jars, jelly jars,baby food jars, peanut butter containers (don't use those for anyone with peanut allergies!)...
After Christmas, anything that didn't get used gets put in the recycle bin, and I have cupboard space once again!
Cherry-Almond Fudge

2 c. sugar
1/2 c. milk
7 oz. marshmallow creme (may use 7 oz. marshmallows instead)
12 oz. semisweet chocolate chips
1 tsp. almond extract
1 tsp. cherry flavor  (I used wild cherry, and it was amazing!)
1/4 c. dried cherries or cranberries, finely chopped
1/2 c. almonds, chopped

Line an 8x8 pan with parchment or foil; butter well if using foil.  Set aside.  Combine the sugar and milk in a medium saucepan.  Bring to a boil, stirring often, then boil for 3 minutes.  Pull off the heat, then add marshmallow creme, chocolate chips, almond and cherry extracts, and dried cherries.  Stir until smooth.  Pour into prepared pan, and sprinkle with chopped nuts.  
Refrigerate 1 hour or until firm, then cut into squares.  Store airtight at room temperature.

Makes just over 2 pounds.


Gingerbread Syrup 
(notice this recipe is basically the same as above, only without the marshmallow, and with extra milk to make it pourable)  If you don't have cinnamon chips, use white chocolate chips or butterscotch chips, then add 1-2 Tbsp. ground cinnamon, to taste.


2 c. sugar (can use brown sugar for deeper flavor, or add 1 Tbsp. molasses)
1 c. plus 2 Tbsp. milk
12 oz. cinnamon chips (I used Hershey's brand)
1 tsp. ground ginger OR 1 drop ginger essential oil
1/2 tsp. ground cloves OR 1 toothpick of clove oil
1/8 tsp. salt
1/2 c. pecans, toasted and finely chopped

In a medium saucepan, bring the sugar and milk to a boil, stirring occasionally.  Boil for 1 minute, then remove from heat.  Stir in cinnamon chips, ginger, cloves, salt, and stir until smooth.  Stir in pecans, then pour syrup into jars.  Store in the refrigerator.  Warm before serving.  (If too thick, microwave briefly.)

Makes about 3 1/2 cups.


0 Comments

Pizza and Pina Colada Smoothie

12/5/2012

0 Comments

 
Picture
Between helping a sick 7-year-old catch up on homework, driving the carpool today, running kids to appointments, and half of them needing to be at their church youth activities an hour later, I needed an easy and quick dinner tonight.  I had a batch of bread dough rising, so I heated the oven to 450 F, took a loaf's worth of dough, rolled it out to fit a greased cookie sheet, and baked it for ten minutes.  While it cooked, I pulled out shredded cheese, opened a can of olives and one of pineapple, and stirred together some red sauce: 1/3 c. tomato powder, 2/3 c. hot water, and 1/4 tsp. salt (or use one 8-oz can of tomato sauce), then spices to taste: a few good shakes of oregano, basil, black pepper, onion powder, a pinch of fennel... whatever you have and smells good with it. 
Spread the sauce on the hot pizza crust, sprinkle on the toppings, then put under the broiler for two minutes, until bubbling.  If you want a few more mixing/cooking details, see this other post.

Since I'd only used part of the can of pineapple and also had some coconut milk in the fridge, I made Pina Colada:   

1 (20 oz.) can of pineapple (or almost a can, in this case)
1/2 cup coconut milk (or use 2-3 Tbsp. shredded coconut and 1/3 c. water)
Half a tray of ice cubes or one handful
1 Tbsp. mild molasses
1 drop lime essential oil or 1/4 tsp. lime zest (optional but adds just the right touch)

Combine in a blender; turn on high until smooth.  Add a little sugar or honey if it's not sweet enough.

I didn't use any more sugar; the lime boosted the flavor enough that the drink didn't really need anything else.

To the pizza and drink, add a salad or other vegetable, and there's supper!

0 Comments

Caramel Pumpkin Bread Pudding

11/9/2012

0 Comments

 
Picture
About six years ago I discovered my boys had a vocabulary problem.  They were using one word to describe everything that tasted good: 'heavenly'.
This bothered me for two reasons-  one, I'm sure heaven is much better than the best food, and two, they weren't expanding their vocabulary.  This was a perfect time.  So we pulled out a thesaurus and looked up 'delicious' to come up with a new word to use.  'Toothsome' had them rolling on the floor laughing, so that became the new favorite.  
I've discouraged them using 'heavenly' very often- but I'll tell you, that was the first word that popped into my head (I didn't say it!) when the first spoonful of moist, custardy, caramel-y, pumpkin dessert hit my tastebuds.  

My apologies to Heaven.
  

This is a modified version of Caramel Bread Pudding.  (The link has other ways of using up stale bread, too.)  The spices in this play a supporting role to the pumpkin flavor: just enough there to help you notice the pumpkin, not the spice.  If you want to taste the cinnamon, double or triple the amount here.

Caramel Pumpkin Bread Pudding- fills a 9x13 pan

15 slices good-quality white bread, cut into 1” pieces (about 16 cups or 20-24 ounces)- baked until crisp (about 10 minutes at 450 degrees)
1 ½ sticks butter
2 cups light brown sugar
1 cup heavy cream or evaporated milk
¼ c. honey or corn syrup  
5 tsp. vanilla, divided
2 1/2 c. half-and-half, or use the last ½ cup evaporated milk from your can (above); use whole milk for the remaining 2 cups here.   
5 large eggs
1 c. pumpkin puree
1/2 tsp. cinnamon  OR 2 tiny drops cinnamon essential oil
1/4 tsp. ground cloves OR 1 tiny drop clove essential oil
1/2 c. toasted nuts, optional

Melt butter and sugar together in a saucepan on medium-high heat.  Stir about 4 minutes, or until bubbly and golden.  Remove from heat and stir in cream or evaporated milk, corn syrup, and 2 tsp. vanilla.  Pour one cup of this caramel into a greased 9x13 pan.  

Set aside one more cup of caramel, to use as topping later.  

To the remaining caramel, add the half-and-half (or mixture of evaporated milk and whole milk).  Beat the eggs together, then whisk in pumpkin, cinnamon, and cloves.  Whisk in the half-and-half mixture.  Add remaining vanilla.  Fold in the bread, and let sit until soaked through, about 20 minutes. Meanwhile, heat oven to 350 degrees. Put bread mixture into the 9x13 pan, bake about 40-45 minutes, until the top is crisp and the custard is barely set.  Sprinkle with toasted nuts.  Serve warm, with the reserved cup of caramel drizzled on top.
0 Comments

Creamy, Dairy-free Lime Silk Tartlets

7/13/2012

0 Comments

 
Picture
Or Lime Silk Pie.  Just put all the filling in an 8" pie crust.  The recipe is also gluten-free.  If you change the fruit to orange, and add cocoa powder, you get Chocolate Truffle Pie.

A friend recently sent me a very strange-sounding chocolate pie recipe, using avocados and coconut oil in the filling for some healthy fat.  It was so unusual I just had to try it!

It was shockingly good.  So good it deserved some variations. 

This one doesn't use cocoa at all, and takes advantage of the natural green color from the avocados.   

Are you intrigued yet?

Toasty Coconut Crust: (or use your favorite crust)
2 Tbsp. honey
½ c. coconut oil
1/4 tsp. sea salt
2 c. toasted fine-flake coconut

Pull out an 8” pie pan, OR for tartlets, line 30 mini-muffin tins with paper liners (optional, for easier removal).  Stir together the honey, coconut oil, and salt.  Add coconut and mix until smooth.  Press into the pie pan or muffin tins.  For the latter, use 1 Tbsp. per mini muffin tin and press.    Put in the freezer for 10 minutes, while you make the filling.  For easiest removal, take the mini crusts out of the pan (still in the liners) when firm, before adding the filling.

Filling:
2 avocados, about 4-5 oz. apiece
½ c. coconut oil
½ c. honey
½ c. fresh lime juice (or use the juice of 3 limes and make up the difference with water)
1 Tbsp. lime zest, or 6-8 drops lime essential oil
2 Tbsp. coconut cream concentrate (optional but softens the sharpness a little)
1 tsp. vanilla
1/8 tsp. salt

Put all the filling ingredients in a blender or food processor.  Puree until smooth.  Pour into your prepared crust.  Chill at least four hours, until firm.  (To speed it up, try 30 minutes in the freezer.)  Let sit at room temperature for 10 minutes if you want the filling a little softer.

Garnish with a dollop of coconut yogurt (or sour cream if dairy’s OK for you) and a bit of lime zest.    Makes one 8” pie or about 30 tartlets.


One website dedicated to avocado recipes - including both unique and stand-by recipes- is TheAmazingAvocado.com   

I'd love to hear back from you once you try this lime pie!

What else do you  do with avocados? 


0 Comments

Fresh Pineapple-Strawberry Salad with Honey-Lime Poppyseed Dressing

6/5/2012

0 Comments

 
Picture
A local store (Winco) has fresh pineapples for $. 99 apiece.  What a treat!  They always remind me of watching my grandmother and aunts bottle jar after jar of pineapple in a hot kitchen.  The smell carried clear outside the house, and we grandchildren would sit, watching and chewing on pineapple cores until our tongues hurt.  There was also the time the caramel smell of baked pineapple wafted out of my great-grandmother's attached apartment... after shopping, she'd set her pineapples on top of the the cooktop, and somehow it got turned on.

Anyway, I made this salad for a family get-together yesterday; my grandparents were in town.  The tartness of the strawberries is tamed by the super-sweet pineapple, as well as the honey in the dressing, and the lime accents the bright flavors.  Banana tames the intensity just enough.

Pineapple-Strawberry-Banana Salad with Lime-poppyseed dressing

Dressing:
2 Tbsp. honey
1 Tbsp. poppy seeds
8 drops lime essential oil, or 1 Tbsp. finely shredded lime zest
1 Tbsp. lime or lemon juice (I used one lime ice cube)

    Whisk together and set aside.

Fruit:
1fresh pineapple, cut into bite-sized pieces
1 lb. strawberries, sliced
2-4 bananas

    Put in a large bowl, pour dressing over; stir and fold gently to coat.  Other fruits to use, either in addition to the bananas or instead of them, could include apples, pears, or mango. 
0 Comments
<<Previous

    Need a Search bar?
    One day I may upgrade my website-- but until then, use your web browser search bar. Type in my web address and what you're looking for, like this-- 
    www.theprovidenthomemaker.com  pumpkin --  and you should get results.


    Author

    I'm a disciple of Christ, a member of the Church of Jesus Christ of Latter-day Saints, a family-defending, homemaking, and homeschooling mom of eight children, two of whom sometimes can't have milk or wheat. Growing up on a farm in a high mountain valley, my parents taught me to 'make do', work hard, smile, and help others.  I love cooking, learning, growing food and flowers, picking tomatoes, and making gingerbread houses --which CAN be made allergy-friendly-- with my children.  I hope you find something to help you on my site!

    Archives

    April 2024
    July 2023
    April 2022
    September 2021
    March 2021
    December 2020
    April 2020
    March 2020
    February 2020
    January 2020
    December 2019
    November 2019
    October 2019
    September 2019
    August 2019
    July 2019
    June 2019
    May 2019
    April 2019
    January 2016
    November 2015
    October 2015
    September 2015
    March 2015
    February 2015
    November 2014
    October 2014
    September 2014
    August 2014
    July 2014
    June 2014
    May 2014
    April 2014
    March 2014
    February 2014
    January 2014
    December 2013
    November 2013
    October 2013
    September 2013
    August 2013
    July 2013
    June 2013
    May 2013
    April 2013
    March 2013
    February 2013
    January 2013
    December 2012
    November 2012
    October 2012
    September 2012
    August 2012
    July 2012
    June 2012
    May 2012
    April 2012
    March 2012
    February 2012
    January 2012
    December 2011
    November 2011
    October 2011
    September 2011
    August 2011
    July 2011
    June 2011
    May 2011
    April 2011
    March 2011
    February 2011
    January 2011
    December 2010
    November 2010
    October 2010
    September 2010

    Categories

    All
    Alcohol
    Alternate Cooking
    Appearances
    Apple
    Apricots
    April Fools
    Aprons
    Bananas
    Beans
    Beef
    Beets
    Bench
    Beverages
    Bonnet
    Bread
    Breakfast
    Budget
    Budgeting
    Cake
    Candy
    Canning
    Carrots
    Cheese
    Chicken
    Children
    Chocolate
    Christmas
    Cleaning
    Coconut
    Comfrey
    Common Core
    Constitution
    Cookbook
    Cookies
    Cooking Oil
    Crafts
    Dairy Substitutions
    Dehydrating
    Dessert
    Dried Fruit
    Earth Oven
    Earthquake
    Easter
    Edible Weeds
    Eggs
    Emergency Prep
    Essential Oils
    Faith
    Family Home Evening
    Fertilizing
    Food Storage
    Fourth Of July
    Freezer
    Frosting
    Fudge
    Garden
    Gardening
    Gingerbread
    Gluten
    Gluten Free
    Gold
    Government
    Grains
    Gratitude
    Hat
    Herbs
    Home Remedies
    Home Repairs
    Homeschool
    Home Storage
    Honey
    Hope
    Inflation
    Leftovers
    Legumes
    Lemon
    Main Dishes
    Mixes
    Mothers
    Noah
    Non Artificial Colors
    Non-artificial Colors
    Nuts
    Oats
    Oil
    Orange
    Paint
    Peaches
    Pear
    Pie
    Pizza
    Plums
    Poem
    Popcorn
    Pork
    Potatoes
    Powdered Milk
    Prayer
    Preparedness
    Projects
    Prophecy
    Pruning
    Pumpkin
    Quick Bread
    Rhubarb
    Rice
    Salad
    Salt
    Sauces
    Self Reliance
    Self-reliance
    Sewing
    Shelf Life
    Shelves
    Sky
    Smoothie
    Snacks
    Soup
    Spices Or Seasonings
    Squash
    Strawberries
    Substitutions
    Sugar
    Summer Fun
    Three Month Supply
    Time
    Tomatoes
    Trees
    Truffles
    T-shirts
    Tuna
    Ultra Gel
    Valentine\'s Day
    Vegetables
    Water
    Watermelon
    Wheat
    Work
    Year Supply
    Zucchini

    RSS Feed

Web Hosting by iPage